 Mikrotik Configuration
This article describes the installation and configuration steps for Mikrotik routers.
The configuration applies to Mikrotik routers with RouterOS L4 and beyond.
Winbox is a small utility that allows the administration of Mikrotik RouterOS using a fast and simple GUI. It is a native Win32 binary but can be run on Linux and MacOS (OSX) using Wine. Winbox loader can be downloaded directly from the router or from the Mikrotik download page.
Login to your Mikrotik using a router MAC address.
Go to Quick Set and set Network Name to the desired one (Hotspot in this example) and press on the Apply Configuration button.
Other settings on the Quick Set page should be set as default.
Default settings:
Mode: HomeAP
Address Aquisition: Automatic
DHCP and NAT should be enabled.
Go to IP – Services, enable www-ssl.
Go to IP – Hotspot and from Walled Garden add the following as DST Host (add domains one by one):
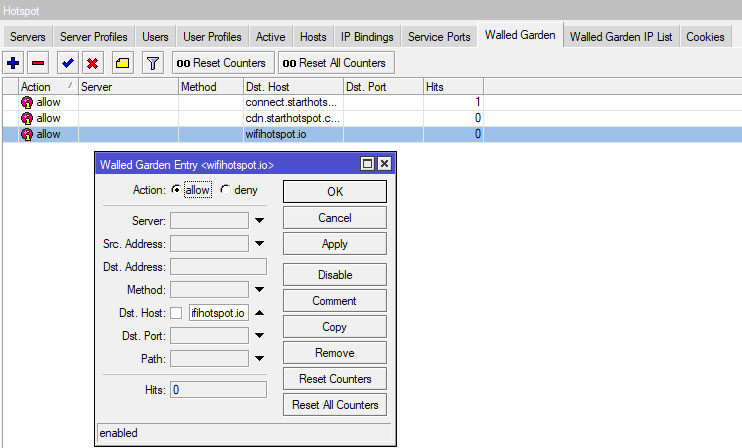
and if you use social networks or payment gateway like Stripe add:
Download login.html file (which is doing the redirection to the splash page) and unzip it. Open the Files section in your Winbox and look for the same filename, it’s usually located in the hotspot folder. Replace this file (drag & drop over the existing one).
In some mobile devices like iPhone, CNA displays a blank page after a successful connection with a word success barely visible.
If you want to display a large message on the screen that the customer successfully connected, download alogin.html, and replace the same way as the previous one.
Click Radius and create new profiles:
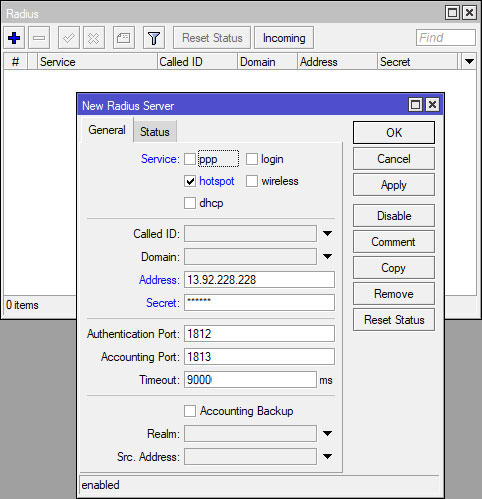
Add new Radius profile:
In case of slower connections, like VSAT, update Timeout.
Go to IP-Hotspot- Servers – Hotspot Setup.
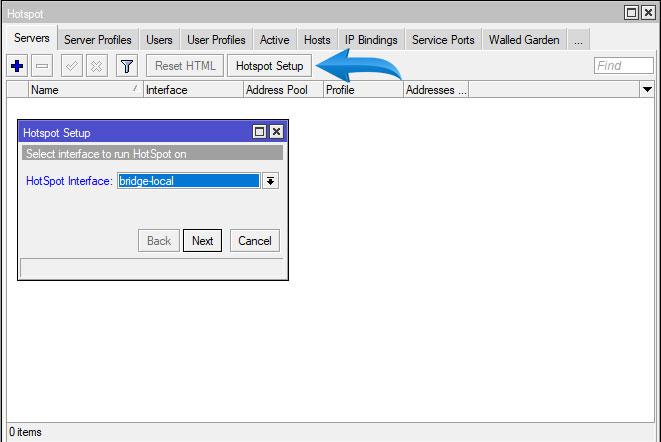
Login again using Winbox and go to IP – Hotspot – Servers tab.
Double click on the created hotspot. Change the hotspot server Name to the MAC address of your Mikrotik WAN interface and press OK.
IMPORTANT: Usually there is written hotspot1, change it to WAN MAC in
format 00-00-00-00-00-00

Go to Server Profiles and click on it.
Under the Login tab select to use only HTTP PAP.
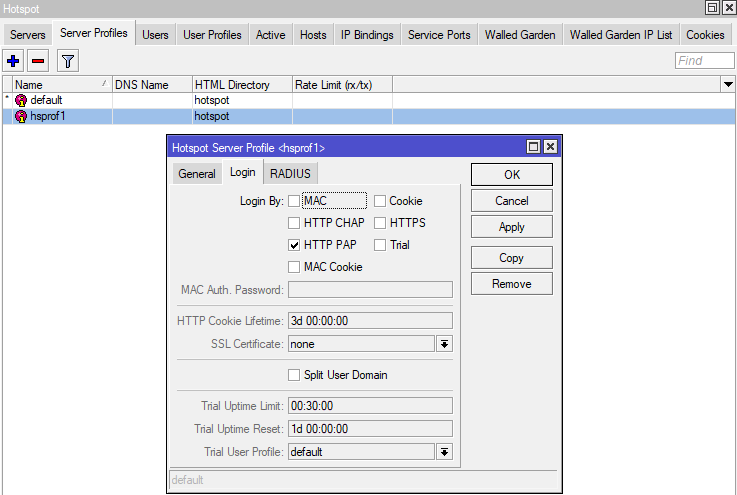
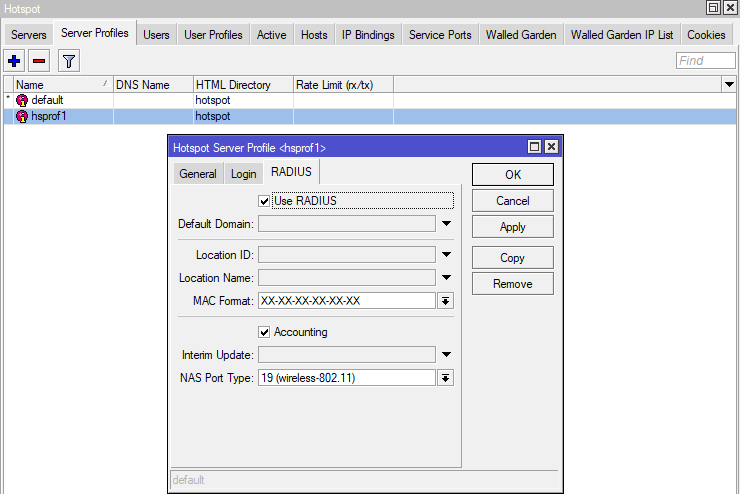
Under RADIUS tab select option Use RADIUS, change MAC format to
XX-XX-XX-XX-XX-XX and press OK.
Note: add your computer IP into the Walled Garden to prevent disconnecting during Hotspot configuration.
If you get disconnected and get login screen in your browser, create a user in the Hotspot platform and login with this user. This should reenable access to the router.
Recent browser updates require full HTTPS compliance on the splash page. Therefore, you need to install the certificate in your MikroTik so it can accept the form post of the login credentials using HTTPS.
First, make sure that you have replaced login.html file with this one.
If you want to enable HTTPS login, SSL Certificate is required. You can buy a certificate at any SSL reseller store (usually $10) and implement using the steps described below.
Our registered customers with a minimum 1 yearly license can contact us to get an SSL certificate for free, predefined for our login.wifihotspot.io subdomain. To get it with your own domain or subdomain, please order with an SSL reseller, like from here. Self-signed certificates are not recommended as they will trigger errors.
To configure HTTPS Login, please follow these steps:
Go to Files and upload SSL certificate files on the router.

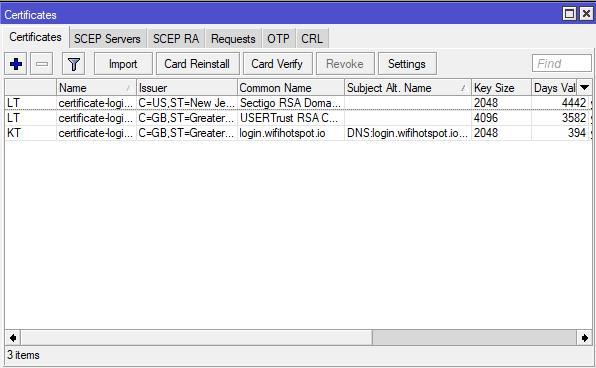
Open System – Certificates option and import uploaded SSL certificate files.
In case of our certificate, you should see this:
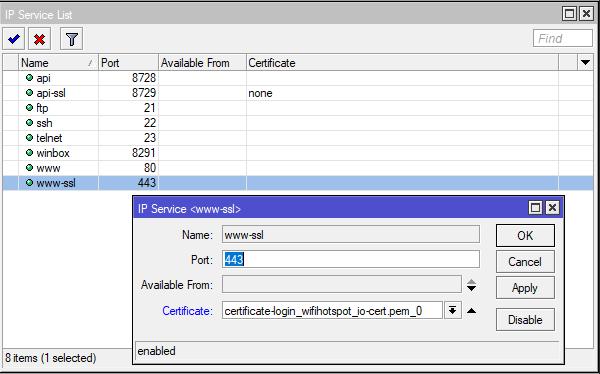
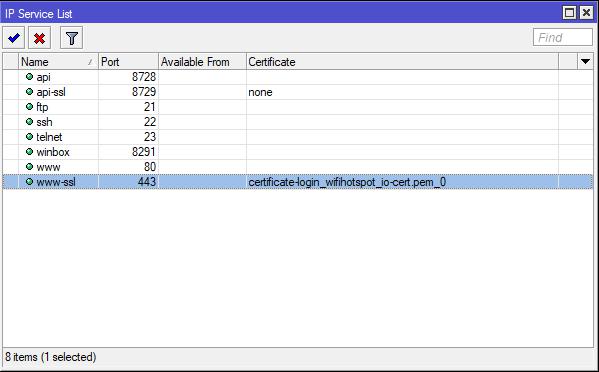
Open IP – Services option. Make sure that SSL is enabled, set port 443, and select your certificate in the Certificate dropdown menu.
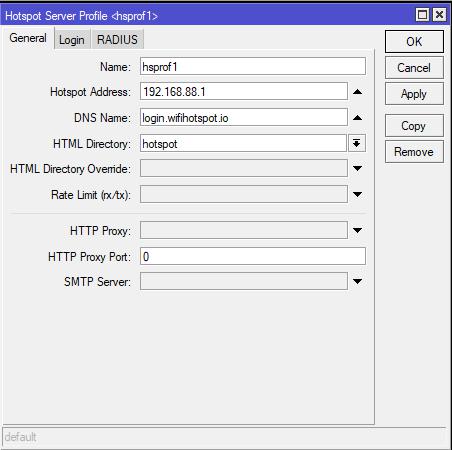
Open IP – Hotspot – Server profiles tab and select hsprof1 profile. In the General tab set the certificate domain address in the DNS Name field.
Open the Login tab and enable the HTTPS checkbox.

Apply settings and test.
If you get certificate error, please turn off HTTPS Redirection (if your Router OS has this option). With this option disabled, if the unlogged user tries to open HTTPS website (Google as homepage), it will be redirected to hotspot login with a different HTTPS certificate and the browser will show a certificate warning (ex. instead Google certificate it received Hotspot certificate).
______________________________________________________
If your Mikrotik is not redirecting user to the welcome page defined in the cloud portal (you need to have a dedicated welcome splash page configured in the WiFi location that contains Welcome widget) please do this:
Login as the end user on your computer to open access for Winbox.
Copy file login.html to the Winbox files section.
______________________________________________________
In some mobile devices like iPhone, CNA displays a blank page after a successful connection with a word success barely visible.
If you want to display a large message on the screen that the customer successfully connected, download alogin.html, and replace it the same way as the previous one.
______________________________________________________
If *t-msedge.net is added and logo and background images are not displayed please add standard.t-0001.t-msedge.net in the Walled garden.
In case that you have this domain in the Walled garden but images aren’t still displayed, open command prompt and ping cdn.wifihotspot.io to discover the correct domain. Add this domain in the Walled garden.
______________________________________________________
In case that Mikrotik requires the password to connect a user to SSID, please disable security like WPA, etc. It is a common practice to allow users to connect without a password as the portal controls Internet access.
______________________________________________________
Make sure that you connected Internet cable into WAN port and reboot Mikrotik.
______________________________________________________
Make sure that Internet connection ( Address Aquisition) is set to Automatic.
______________________________________________________
Make sure that Hotspot Server Name is changed to the MAC address of your Mikrotik WAN interface in format 00-00-00-00-00-00
______________________________________________________
Some Mikrotik models ( HAP, HAP Lite…) have a problem with the bandwidth limits.
If you experienced a similar issue, go to IP / Firewall / Filter Rules and disable Fasttrack Connection.