 Netgear
Please select a model and download HotspotOS.
DownloadHotspotOSConfigurationTroubleshoot
Please reset the AP / WiFi router to factory settings to avoid problems with some previous configuration.
Connect your computer LAN using the cable to router Ethernet port.
Set the static IP address in 192.168.0.x range
In the address bar of the web browser, enter 192.168.0.1 and login using admin as username and admin as password.
Go to the Maintenance/Upgrade page.
Click Browse and navigate to the location where the HotspotOS for your model is downloaded and press Open.

The HotspotOS installation procedure can take a few minutes.
During this process, you will see information about the processing.
Reconnect LAN cable or Disable/Enable NIC card in order to get a new valid IP address in 10.200.0.x range from router.
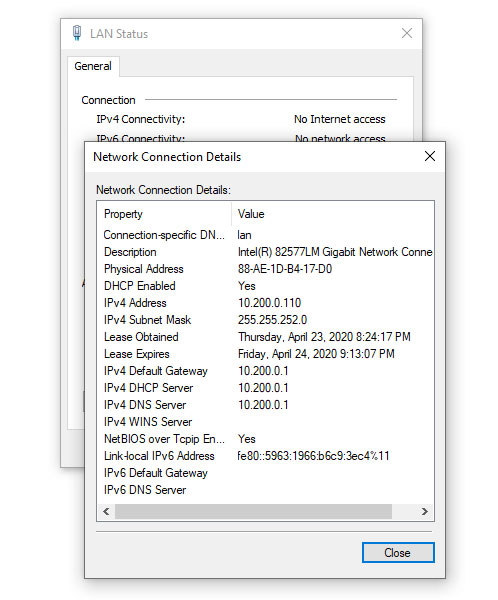
Start your browser and in URL field type http://10.200.0.1:8089/ to login to HotspotOS.
Username: admin
Password: admin
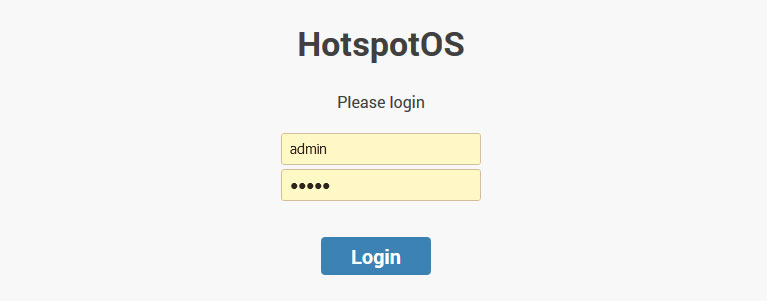
Press the Login button to access to Status tab.
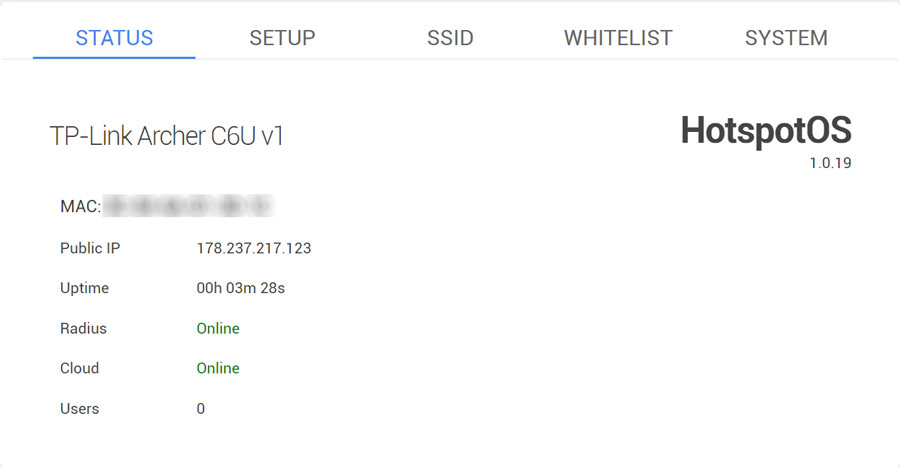
On the HotSpotOS Status page, you can check AP MAC address, Public IP, device Uptime, Radius and Cloud status, and a number of users connected to AP.
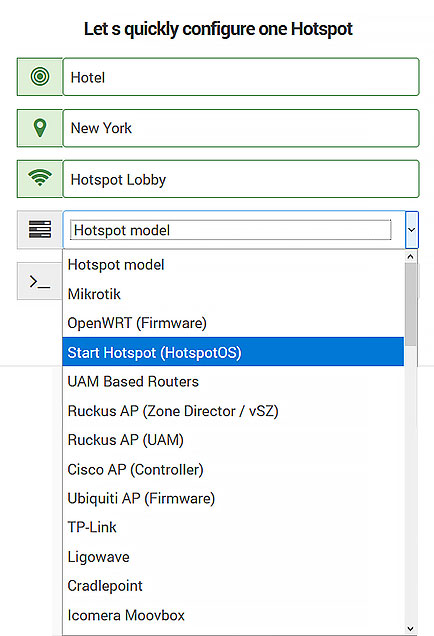
The MAC address of your AP will be used in the SignUp process.
During SignUp, after typing HotSpot name, select as HotSpot model HotspotOS, and add your MAC address from the Status tab.
From the Setup page configure your AP.
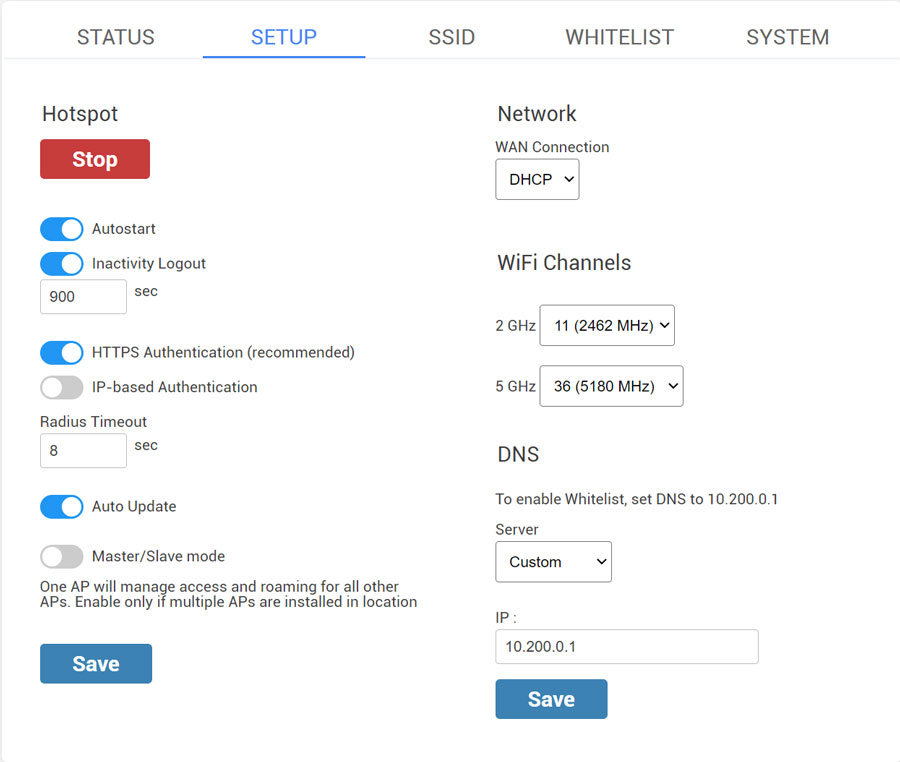
The Hotspot is started and the Autostart and Inactivity Logout options are active by default.
Inactivity Logout is set to 900 sec. Inactivity period defines how long will the device stay logged-in without activity. This prevents repeated logins if the connection temporarily breaks.
IP-based Authentication is used to switch AP domain ap.wifihotspot.io to 10.200.0.1
It is recommended to disable this option to avoid issues with https-based websites.
Radius Timeout – 8sec
Auto Update – enabled
Master/Slave mode
One AP will manage access and roaming for all other APs.
Enable only if multiple APs are installed in a location.
By default as Network WAN Connection is set DHCP, but you can choose network protocol based on your needs. Our recommendation is to use DHCP Network Protocol.
WiFi channels – Eleven channels are designated in the 2 GHz range, spaced 5 MHz apart from each other. Those eleven channels in the spectrum are allowed anywhere in the world.
DNS – Custom
IP – 10.200.0.1
Save changes.
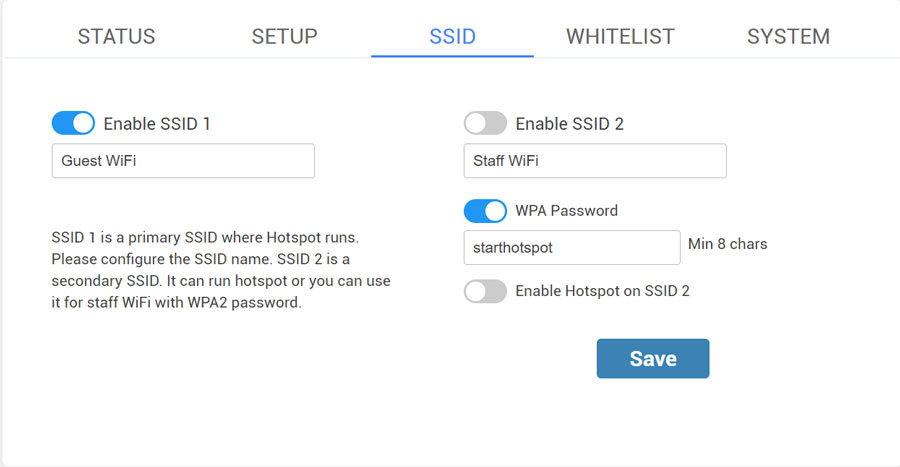
From the SSID tab, you can Enable SSID 1 and 2.
Configure the SSID name and enable it.
Secondary SSID 2 is mostly used for staff WiFi with WPA2 password but you can also enable Hotspot on it.
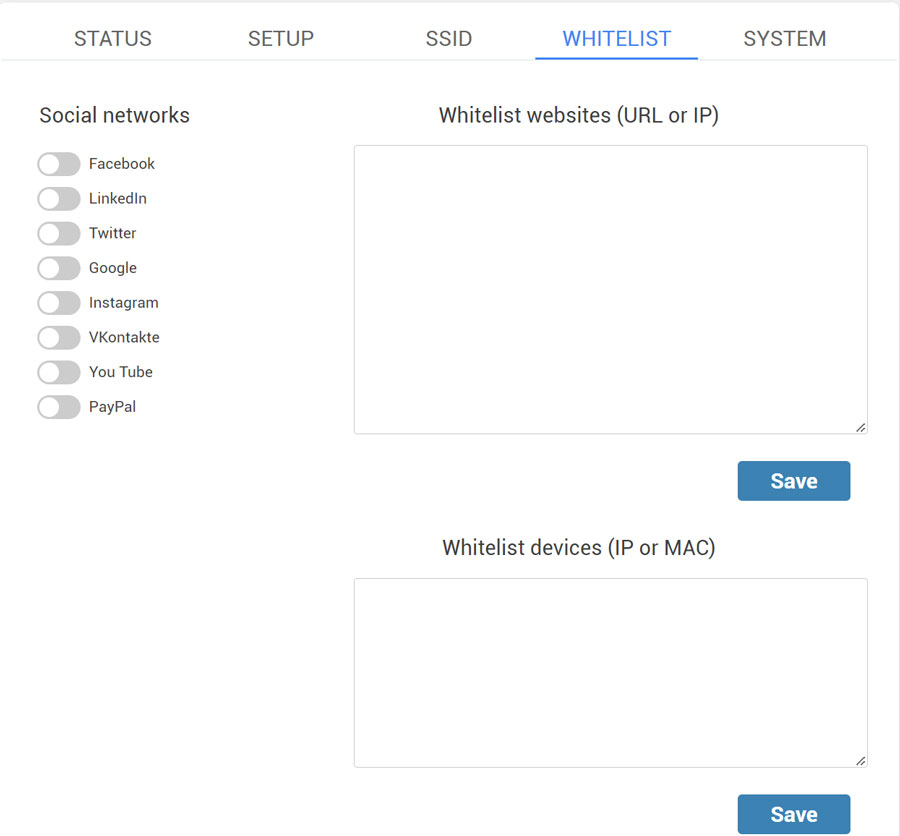
If you want to use Social network login feature or Paypal as payment gateway, enable it on the Whitelist tab and Save changes.
You can also whitelist websites based on URL, IP, or MAC.
From the System tab, you can flash HotspotOS image and change the Admin password.
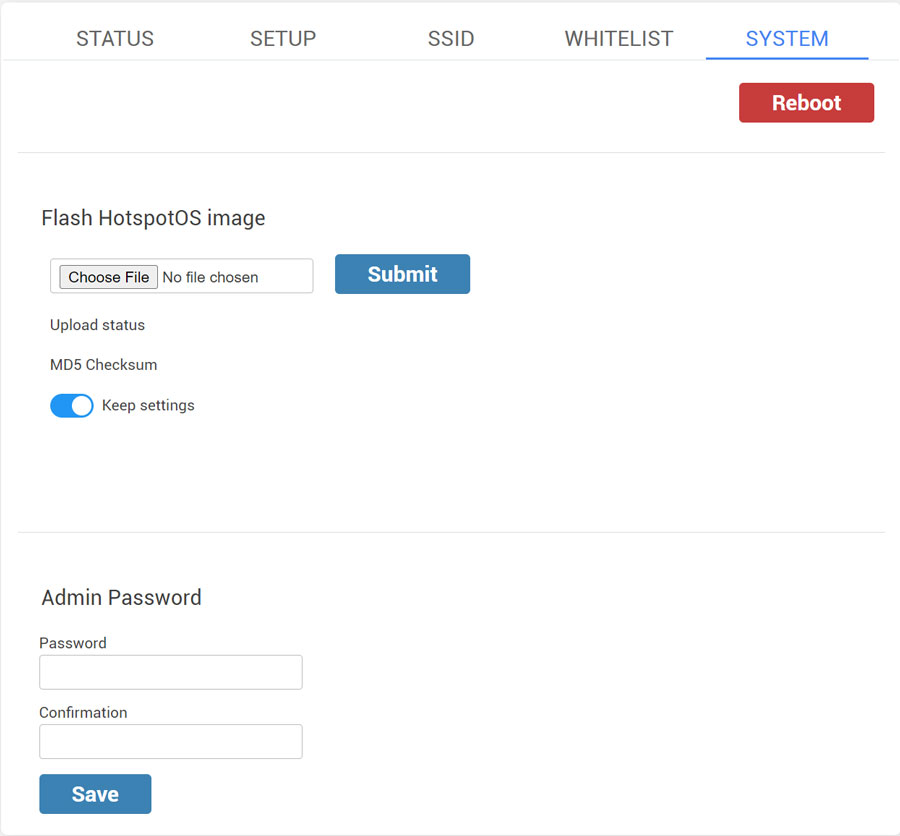
When you finish setup, restart the AP / WiFi router to apply changes.
Netgear HotspotOS Download
Netgear AC2400
COMING SOON!
Login to Netgear webinterface and flash HotspotOS.
Netgear D7800
Download HotspotOS
Netgear EX2700
COMING SOON!
The HotspotOS images can be flashed from the stock firmware’s web interface.
Netgear EX3700
Download HotspotOS
The HotspotOS images can be flashed from the stock firmware’s web interface.
Connect your computer to the Wireless Extender
Login to the extender via https://mywifiext.net
Look for “Firmware Update/Upgrade”
Select browse and look for the HotspotOS image you downloaded, and select it.
Click Start/Begin.
It will now say that the firmware is being updated.
Wait for the process to complete.
Once it says the firmware has been updated, close the page, connect your computer to the Ethernet port on the extender, and SSH to 192.168.1.1, The default user is “root” and there is no password set.
Netgear EX3800
Download HotspotOS
The HotspotOS images can be flashed from the stock firmware’s web interface.
Connect your computer to the Wireless Extender
Login to the extender via https://mywifiext.net
Look for “Firmware Update/Upgrade”
Select browse and look for the HotspotOS image you downloaded, and select it.
Click Start/Begin.
It will now say that the firmware is being updated.
Wait for the process to complete.
Once it says the firmware has been updated, close the page, connect your computer to the Ethernet port on the extender, and SSH to 192.168.1.1, The default user is “root” and there is no password set.
Netgear EX6100 v2
Download HotspotOS
Install via Web-Interface:
Upload the HotspotOS image to the Netgear Web-Interface.
The device might asks you to confirm the update a second time due to detecting the HotspotOS as older. The device will automatically reboot after the image is written to flash.
Netgear EX6120
COMING SOON!
The HotspotOS images can be flashed from the device’s web interface or via nmrpflash.
Netgear EX6130
COMING SOON!
The HotspotOS images can be flashed from the device’s web interface or via nmrpflash.
Netgear EX6150
Download HotspotOS
The HotspotOS images can be flashed from the device’s web interface or via nmrpflash.
Netgear EX6150 v2
Download HotspotOS
Install via Web-Interface:
Upload the HotspotOS image to the device to the Netgear Web-Interface.
The device might asks you to confirm the update a second time due to detecting the HotspotOS as older. The device will automatically reboot after the image is written to flash.
Netgear EX6400
Download HotspotOS
If you can get to the stock firmware’s firmware upgrade option, just feed it the HotspotOS.img and boot as usual.
As an alternative, TFTP the HotspotOS.img to the bootloader.
Netgear EX7300
Download HotspotOS
If you can get to the stock firmware’s firmware upgrade option, just feed it the HotspotOS.img and boot as usual.
As an alternative, TFTP the HotspotOS.img to the bootloader.
Netgear R6100
COMING SOON!
Note: Reset router to factory defaults if it has been previously configured.
Browse to https://192.168.1.1/adv_index.htm
Select Administration, then Firmware Upgrade from menu to left of screen.
Select browse and locate the HotspotOS file
Select the Upload button
The HotspotOS file will be validated and the current firmware version and the uploaded version will be displayed.
Select the Yes button to transfer the HotspotOS file to the router.
Wait for upload to finish and router to reboot
Netgear R6120
Download HotspotOS
Note: Reset router to factory defaults if it has been previously configured.
Browse to https://192.168.1.1/adv_index.htm
Select Administration, then Firmware Upgrade from menu to left of screen.
Select browse and locate the HotspotOS file
Select the Upload button
The HotspotOS file will be validated and the current firmware version and the uploaded version will be displayed.
Select the Yes button to transfer the HotspotOS file to the router.
Wait for upload to finish and router to reboot
Netgear R6220
Download HotspotOS
Apply image via OEM web-gui.
If after HotspotOS flashing you still see the OEM ROM, flash HotspotOS again.
Afterward your router will definitely boot HotspotOS.
nmrpflash can be used to recover to the Netgear firmware if a broken image was flashed.
At first launch, the wireless network is disabled, nevertheless the wireless LED is on.
A reboot, or use of the wireless hand switch, restores the right LED status.
There is no default LED rules configurated, you must add them manually.
This doesn’t prevent the router to work just fine.
Netgear R6230
Download HotspotOS
Apply image via OEM web-gui.
If after HotspotOS flashing you still see the OEM ROM, flash HotspotOS again.
Afterward, your router will definitely boot HotspotOS.
nmrpflash can be used to recover to the Netgear firmware if a broken image was flashed.
Netgear R6260
COMING SOON!
Netgear R6350
Download HotspotOS
Apply image via OEM web-gui.
If after HotspotOS flashing you still see the OEM ROM, flash HotspotOS again.
Afterward, your router will definitely boot HotspotOS.
nmrpflash can be used to recover to the Netgear firmware if a broken image was flashed.
Netgear R6700 v2
COMING SOON!
Login to Netgear webinterface and flash HotspotOS.img
Netgear R6800 v1
COMING SOON!
Apply factory image via stock web-gui.
Back to stock:
nmrpflash can be used to recover to the stock Netgear firmware.
– Device has 3 wifi LEDs: Wifi 5Ghz, Wifi 2.4Ghz and Wifi on/off.
Wifi on/off is not used.
Netgear R6850
COMING SOON!
Netgear R7500 v1
Download HotspotOS
Don’t attempt to flash unless you have a UART serial device.
Download the HotspotOS.img file for your model
Reset to factory default by navigating to “Advanced → Administration → Backup Settings” and selecting “Erase”.
Once the router has finished rebooting, login to default IP (192.168.1.1) and navigate to “Advanced → Administration → Router Update”.
Select “Browse” and input the path to the HotspotOS you downloaded previously, and then click “Upload”.
Click “OK” and “Yes” on the confirmation windows, and then wait for the router to finish updating and rebooting.
Login to default IP (again 192.168.1.1) and configure
– 5 GHz wifi not working – there is no quantenna driver
– One of the USB ports is not working
Netgear R7500 v2
Download HotspotOS
Netgear R7800
Download HotspotOS
Netgear WN2000RPT v1
COMING SOON!
Netgear WN3000RP v3
Download HotspotOS
Netgear WNDAP360
Download HotspotOS
Netgear WNDR3700 v1
Download HotspotOS
Flash via the factory web interface.
Netgear WNDR3700 v2
Download HotspotOS
Flash via the factory web interface.
Netgear WNDR3700 v5
Download HotspotOS
To install simply use the stock WNDR3700 GUI to upload and install HotspotOS. Non North American users will get a warning regarding that HotspotOS identifies itself an NA, don’t worry. You can just simply ignore this.
OEM installation using the TFTP method (recommended)
Hold the ‘System Restore’ button on the underside of the router while powering it on, and hold the button until the power led blinks green.
Then, upload the HotspotOS firmware.
However, note that the router will not accept the HotspotOS when the filename is too long! Using hotspotos.img as filename should work.
After upload, the power led is turned off, and flashing starts, after that is finished the router will restart and the power led will eventually become stable green (it will be stable orange for quite some time first).
Netgear WNDR3800
Download HotspotOS
OEM easy installation
You may install HotspotOS using upgrade firmware of web interface of original firmware.
Download a HotspotOS image.
Set IP from pool 192.168.1.2-192.168.1.254 on your computer and open https://192.168.1.1 in the web browser.
Select an Administration page, use the firmware file selection button, and firmware upgrade button to start the HotspotOS upgrade process.
Confirm firmware upgrade to HotspotOS.
Wait upload process, firmware upgrade process, additional wait up to 10 minutes.
If you can’t connect via telnet, simply switch off and turn on the router, wait a couple of seconds for router booting, and try to connect again.
Netgear WNDR3800 1CHNAS
Download HotspotOS
OEM easy installation
You may install HotspotOS using upgrade firmware of the web interface of the original firmware.
Download a HotspotOS image.
Set IP from pool 192.168.1.2-192.168.1.254 on your computer and open https://192.168.1.1 in the web browser.
Select an Administration page, use firmware file selection button and firmware upgrade button to start HotspotOS upgrade process.
Confirm firmware upgrade to HotspotOS.
Wait upload process, firmware upgrade process, additional wait up to 10 minutes.
If you can’t connect via telnet, simply switch off and turn on the router, wait a couple of minutes ( in some cases, you should wait for more than 10 minutes) for router booting, and try to connect again.
Netgear WNDR4300 v1
COMING SOON!
OEM easy installation
This is for installing for the first time HotspotOS on the router (still with the stock firmware):
Connect your computer to the router with an ethernet cable and browse to https://192.168.1.1/ (default credentials are admin password)
In Netgear web interface go to:
Advanced > Administration > Firmware Upgrade
Upload the HotspotOS file: hotspotos-ar71xx-nand-wndr4300-ubi-factory.img
Proceed with the firmware installation and wait a couple of minutes until it finishes.
OEM installation using the TFTP method
To restore the original Netgear firmware, the firmware files downloaded from Netgear (.img files) can be tftp’d directly to the router (the chapter Recovery flash in the failsafe mode of the Netgear WNDR3700 page is applicable for WNDR4300 too).
Set a static IP on your computer, i.e 192.168.1.2/24 (a.k.a. 192.168.1.2 with a netmask of 255.255.255.0), and connect the ethernet cable to the router (it is important that the cable is plugged in before the following steps).
Power off the router.
Press and hold the RESET button (factory reset button on the bottom with the red circle around it)
turn on the router while continuing to hold the RESET.
Continue to hold the RESET button until the power LED begins to flash orange and then flashes green
once the power LED is flashing green, release RESET.
Start the TFTP transfer to router at 192.168.1.1.
In your computer execute:
tftp 192.168.1.1 -m binary -c put factory.img
You can also break into Uboot command line via serial interface and execute: fw_recovery
Then you can send the factory firmware via tftp client from the computer.
Netgear WNDRMAC v1
Download HotspotOS
OEM easy installation
To install simply use the stock WNDR3700 GUI to upload and install HotspotOS.
Non North American users will get a warning regarding that OpenWrt identifies itself an NA, don’t worry. You can just simply ignore this.
OEM installation using the TFTP method (recommended)
Hold the ‘System Restore’ button on the underside of the router while powering it on, and hold the button until the power led blinks green.
Then, upload the Hotspotos file.
However, note that the router will not accept the firmware when the filename is too long!
Using hotspotos.img as filename should work.
After upload, the power led is turned off, and flashing starts, after that is finished the router will restart and the power led will eventually become stable green (it will be stable orange for quite some time first).
Netgear WNDRMAC v2
Download HotspotOS
OEM easy installation
You may install HotspotOS using upgrade firmware of web interface of original firmware.
Set IP from pool 192.168.1.2-192.168.1.254 on your computer and open https://192.168.1.1 in the web browser.
Select an Administration page, use firmware file selection button and firmware upgrade button to start firmware upgrade process.
Confirm firmware upgrade to HotspotOS.
Wait upload process, firmware upgrade process, additional wait up to 10 minutes.
If you can’t connect via telnet, simply switch off and turn on router, wait a couple of minutes (in some cases, you should wait for more than 10 minutes) for router booting, and again try to connect.
Netgear WNR1000 v2
Download HotspotOS
Open the WebUI of the OEM firmware with your web browser and install the HotspotOS image file using the “Firmware Upgrade” option.
Your device should reboot with HotspotOS installed.
Netgear WNR2000 v1
COMING SOON!
Netgear WNR2000 v3
COMING SOON!
Netgear WNR2000 v4
Download HotspotOS
Netgear WNR2200 16MB (RU/CN)
COMING SOON!
To flash HotspotOS, connect to your router over LAN and select the hotspotos-ath79-generic-netgear_wnr2200-16m-squashfs-factory.img file under Advanced → Firmware upgrade → Manual (or similar) and confirm that you want to flash HotspotOS.
Netgear WNR2200 8MB (EU)
Download HotspotOS
To flash HotspotOS, connect to your router over LAN and select the hotspotos-ar71xx-generic-wnr2200-squashfs-factory.img file under Advanced → Firmware upgrade → Manual (or similar) and confirm that you want to flash HotspotOS.
Netgear WNR612 v2
Download HotspotOS
You may install HotspotOS using upgrade firmware of web interface of original firmware.
Download a squashfs-factory image file of HotspotOS.
Set IP from pool 192.168.1.2-192.168.1.254 on your computer and next open https://192.168.1.1/ in the web browser.
Select the Management page.
Select Update Firmware, use firmware file selection button and firmware upgrade button to start HotspotOS upgrade process.
OEM installation using the TFTP method
Connect via serial console
Interrupt U-Boot by pressing any key
You may need to enable writes to the flash by issuing “protect off all”
At the U-Boot prompt enter the fsload command
A TFTP server starts listening on port 192.168.1.1
Start TFTPing the image hotspotos-ar71xx-generic-wnr612v2-squashfs-factory.img
tftp 192.168.1.1
mode binary
put hotspotos-ar71xx-generic-wnr612v2-squashfs-factory.img
quit
Netgear WPN824N
COMING SOON!
Netgear WPN824N NA
COMING SOON!